Making the karaoke
This page will guide you through making your first karaoke subtitle. First a term that we will mention often from here on: Timing – is syncing lyrics to the audio of your song.
Subtitle styles
You first need a style for your karaoke subtitles. Here you can download a template with several presets. Right click to save it. You will use it each time as a starting point to make a karaoke subtitle. In other words: It is your template to start from whenever you tackle a new song.
Before you begin, it is recommended to save your work in a new file (File > Save Subtitles as…).
Setting up your workspace
Open the template with Aegisub. You first have an almost empty user interface.
Option 1: You have a video as media
Go to Video > Open video… and select your video. You can also drag & drop directly into the interface.
Option 2: You have an audio file because there was no (suitable) video available (like an mp3)
Use Audio > Open Audio File… and select your audio file. You can also drag & drop it directly in the interface.
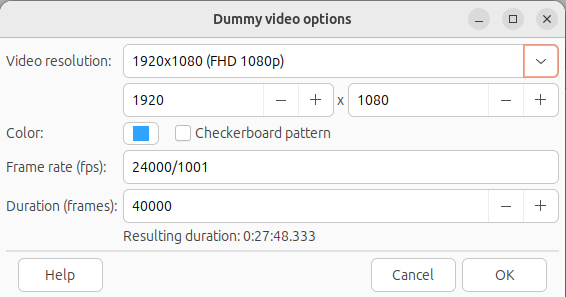
Then go to Video > Use Dummy Video… and pick the “FHD 1080p” quality. The background color is up to you, as well as the video duration (make it longer than the total duration of the audio file, it’s not important) and click “OK”.
Once you’re set
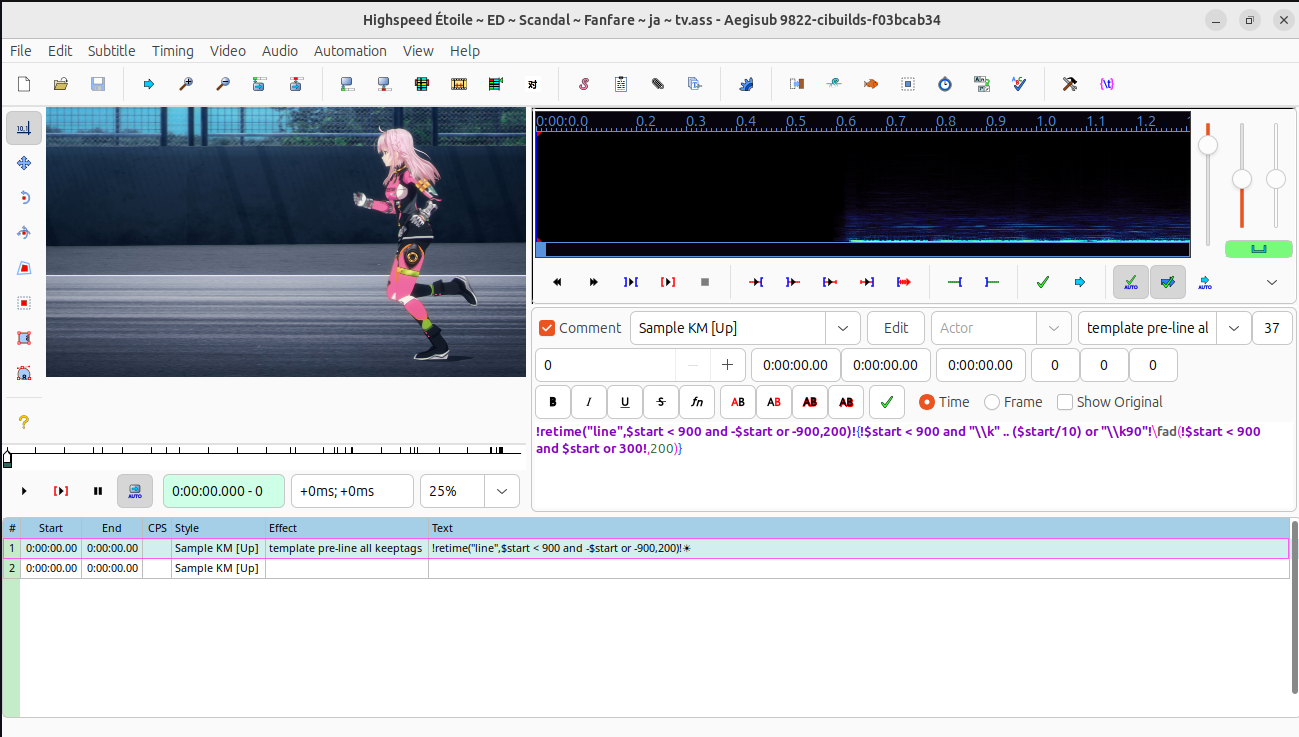
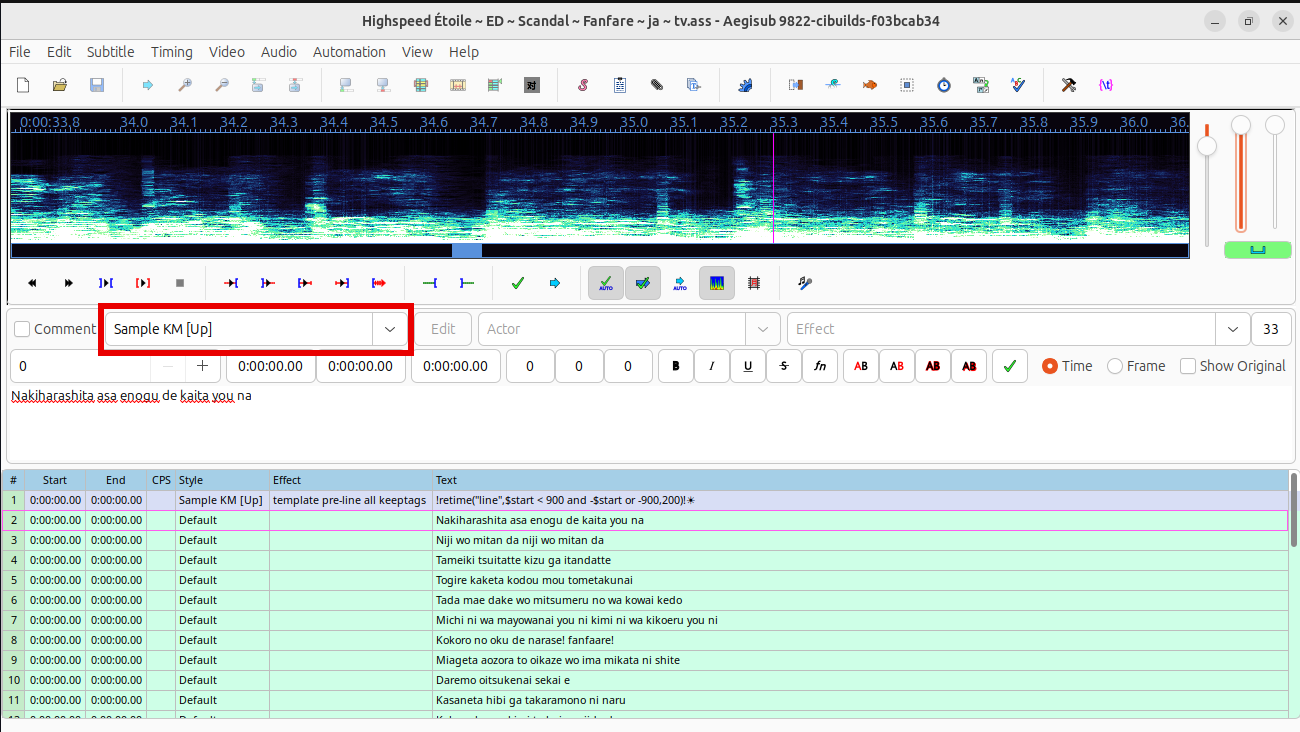
After integrating your file, you should have a screen similar to this one. As an example you can see the synchronization of a song from the Highspeed Étoile anime in this tutorial.
There are two problems that can occur:
-
If you don’t have an audio track at the top right of the screen or if you get no sound when playing your video via the
 button, it means that the sound was not loaded. Fix this with the Audio > Open Audio from Video.
 -
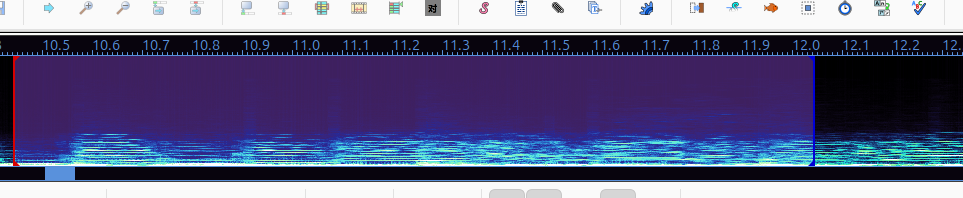
If you do not have the same audio track view, that’s nomal! Fix it by clicking the
 icon. You can change here between a blue and a green spectrum. We highly recommend you use the blue one as this will be shown and explained here and contains a lot of clues that are very helpful for karaoke timing.
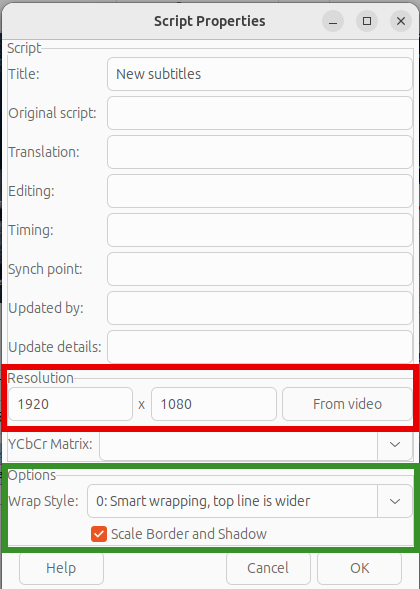
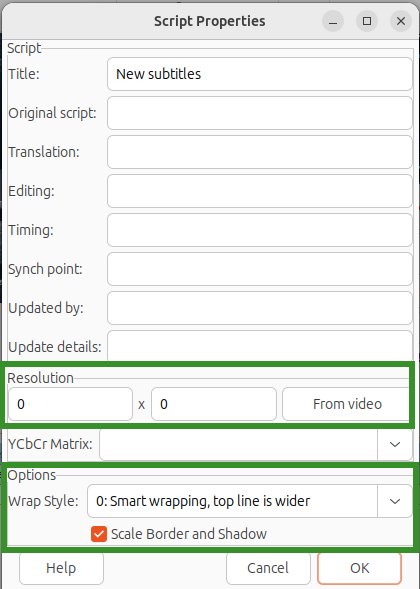
Once the video is set (or the audio), go to File > Properties… and put a resolution of 0 x 0 in, so that the font size is always the same and independent from the video resolution. This must be set every time you open a video (also dummy videos) in Aegisub. If you open an .ass file you wish to modify and forget doing this, you will see that your lines become very small compared to the previous time. If you address this directly after opening the video, you can usually revert the resolution change by simply pressing Ctrl+Z (Edit > Undo change) which saves you some time and clicks.
Also tick “Scale Border and Shadow”, it allows to apply the same style on Karaoke Mugen app and on a Karaoke Mugen Server instances.
Example picture:
The last thing to set up are your lyrics. When you can copy them from somewhere, it is easier to copy in the lyric lines first and then do the timing. Don’t worry about the separation of lines yet too much as we can adjust that later on.
If you have already started timing lines and need to paste the lyrics over it, you can do so by right click and Paste Lines Over… You will see this window then:
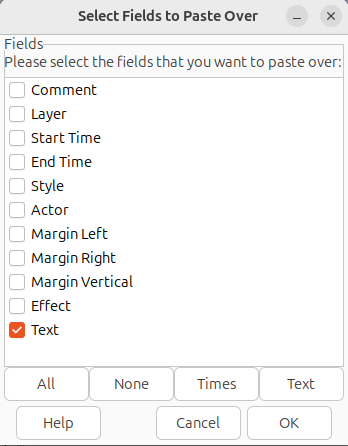
Select only “Text” here and confirm with OK.
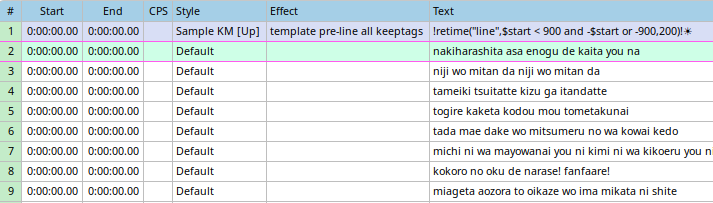
If you just copy lyrics from somewhere, you usually get the lines separated like they are broken up before. It can then look like this:
You can then either format the lyrics to your taste (capitalization, commas etc.) in one go or do it while timing.
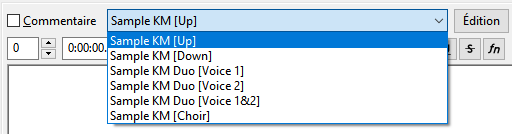
Note here, that the inserted lyrics always get the style “Default”. The Mugen sample script uses “Sample KM [Up]” instead, so you need to change that at some point for the lyrics to be displayed properly. You can do so in the drop down menu marked in the screenshot.
Familiarizing yourself with the workspace
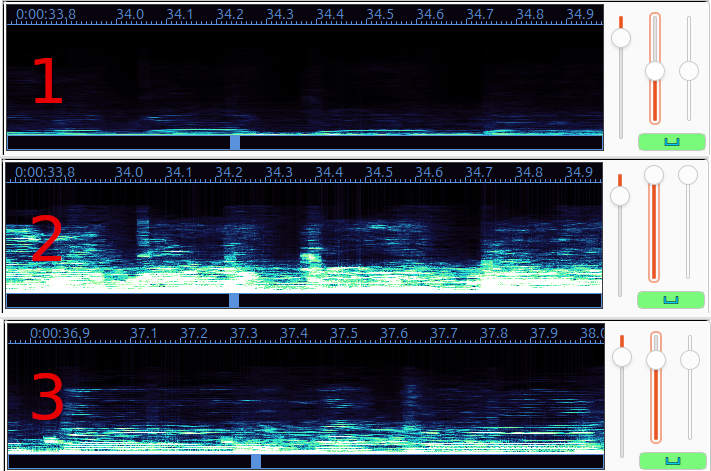
Let’s take a closer look at the spectrum because we will use it from now on.
More space for the spectrum
You can close the video via Video > Close Video for the whole timing process in order to see more of the spectrum.
-
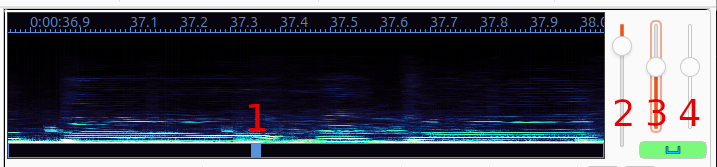
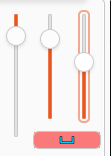
progress bar showing your current position within the audio
-
handle to select the amount of time being shown per cm of your screen
-
handle to select the spectrum intensity (example will follow)
-
handle to select the sound volume
The green box below (3) and (4) connects the volume to the displayed intensity. Generally, you also want a calmer audio displayed with more intensity and vice versa, but it can be bothersome, so you have the option to un-link them by clicking on the green part and then it turns red, so that you can have different levels in the handles which then looks like this:
About spectrum intensity
This involves a lot of personal preference but here are still some examples that will help you getting started:
-
is too low – you can hardly see anything
-
is a bit much, but still workable – but for the loaded file it is the maximum intensity, that is really variable from audio to audio
-
this is the recommended intensity, but there is a rather broad range that works just fine for timing
Using the spectrum
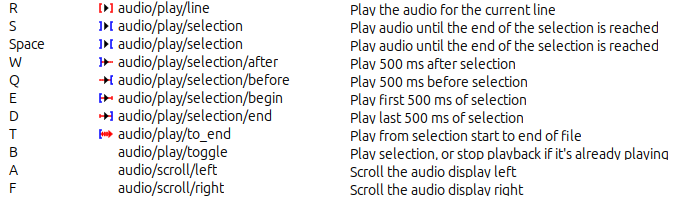
Directly below the spectrum on the left side, you see the buttons to control what is played in the spectrum:

When timing, you generally want to use the hotkeys for these control functions which are on a similar position like arrow controls for the left hand on the keyboard. Here is an overview from the default setting of these hotkeys. You can change them, but that is NOT recommended.
In order to use these hotkeys, you need the focus on the spectrum which can best be achieved by clicking on the progress bar below the spectrum.
The most important hotkeys are:
-
A and F (move the displayed audio fragment in the spectrum back and forth)
-
S (play audio selection)
-
Q (500ms before start to check the precision of the start time)
-
D and W (check 500ms at the end and after the end of your selection to check end time precision)
-
G or enter (both have the same function) are also very useful as they let you commit your changes and go to the next line
Line synchronization (or Line timing)
For this step, we advise you to disable Auto scroll audio display to selected line by clicking on the  button in order to make your work easier. You also want Automatically commit all changes to be enabled which is this button.

The goal for this step is to define the appearance and disapearance time of every lyrics line. We will synchronize syllables later. There is definitely more than one way to do this and we will only show one here. If you achieve the same result by other means, that is no problem for anyone.
Look carefully at those three elements of the “subtitle box”:

-
line start time
-
line end time
-
the unit times are displayes in, best always have “Time” selected here
When you start, all your lines should have 0:00:00.00 time stamps for start and end.
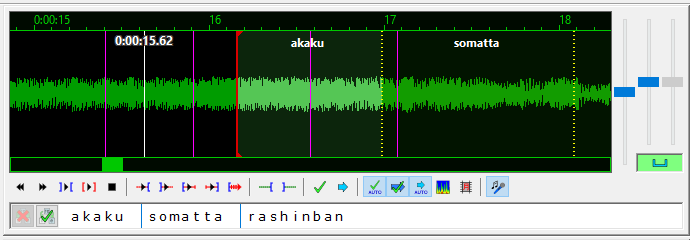
You can define start times in the spectrum with left click which will be marked with a red bracket. End times are selected with right click and marked by a blue bracket. So this is how an audio selection looks in the spectrum:
With that knowledge, you are ready to do the line timing in the following steps:
-
Move to the beginning of your audio in the spectrum.
-
You right and left click into the spectrum to define start and end times.
-
Use the hotkeys on your keyboard as described above to navigate through the spectrum and listen to bits of the audio to get to the right time. It might take some practise to get used to the hotkeys.
-
Go to the next line with G or enter.
-
Repeat steps 2 to 4 until you have timed every line.
There is a lot that can be seen in the spectrum. We will cover some examples in the section Advanced aspects of karaoke timing, if you are interested.
Syllable synchronization (or k-timing)
Once all the lines are synced, it is time to synchronize all your lines syllable by syllable.
The main idea is to first display your subtitle line in white then fill it with a color as your song progresses.
For this we will use tags, more precisely the {\k} tag.
Every syllable in our subtitle line will be separated by a {\kX} tag, where “X” is number of 1/100 s (cs or centi-second) that a syllable lasts before the next one starts.
As an example, the first line will turn from nakiharashita asa enogu de kaita you na to {\k33}na{\k20}{\k20}ki{\k50}ha{\k15}ra{\k35}shi{\k16}ta {\k17}a{\k52}sa{\k17} {\k50}e{\k20}no{\k49}gu {\k19}de {\k33}kai{\k36}ta {\k34}you {\k34}na.
Fortunately, you don’t have to precisely measure every 1/100 second of each syllable: Aegisub has a Karaoke Assistant. You can enable it by clicking the button (last icon below the spectrum).

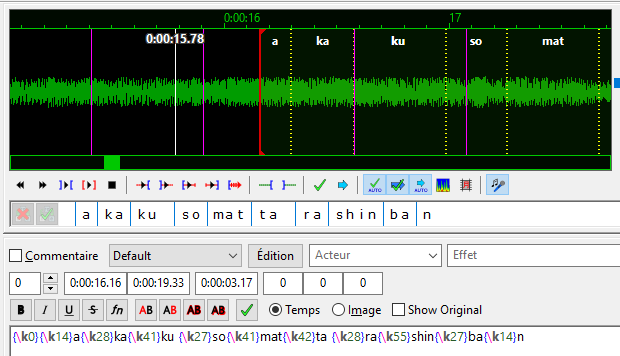
You will notice two changes on the upper right part of your user interface: your text now appears word by word on your sound spectrum, and that same text appears pre-cut below the spectrum. It is also possible to adjust the display settings of the spectrum with the handles to the right as explained above.
To k-time with the karaoke assistant, you first need to separate your syllables. You can do so by clicking at every needed separation in the text of your line displayed directly below the audio spectrum. You can play the whole line by pressing

and then separate your syllables accordingly or do it blind – your choice.
There are some rules on syllable separation for every language. On this page, we will focus on the general concepts. Please refer to Advanced aspects of karaoke timing for language-specific details.
Here are the general aspects of syllable separation:
-
Strive to separate two distinct sound bits as separate syllables. For example, if you hear “so-ma-a-ta” (for the Japanese word somatta), please separate so|ma|t|ta.
-
Some syllables might be hard to distinguish from each other. If in doubt, better keep them together. Example: in Japanese you can hear “shin” as shi-n or shin. Separate if you can hear it.
-
Avoid syllables that span spaces even though that might be more correct “by ear”, e. g. “les histoires” in French is pronunced as “le-sis-toir”. Please keep the s with “les” as les |his|toires in this case.
-
Cut syllables at the end of words after the space, so “my |mother” instead of “my| mother”. Aegisub will usually do it in this way automatically in the pre-cut.
If you made a mistake, you can un-separate syllables by clicking on the vertical line again. Sometimes this creates a second split meaning your cursor position was not precise enough.
After that, it is very similar to line timing except that you move the dashed yellow lines by dragging (click and hold) them to different positions to set the time where one syllable ends and the next starts. The first time you move one of the yellow lines, \k tags will be added to the line according to the more or less random automatic time split for the syllables.
You can use all controls and hotkeys you already learnt for the line timing. They will now be applied to the currently marked syllable, so if you press S e. g. you will hear the selection for the current syllable.
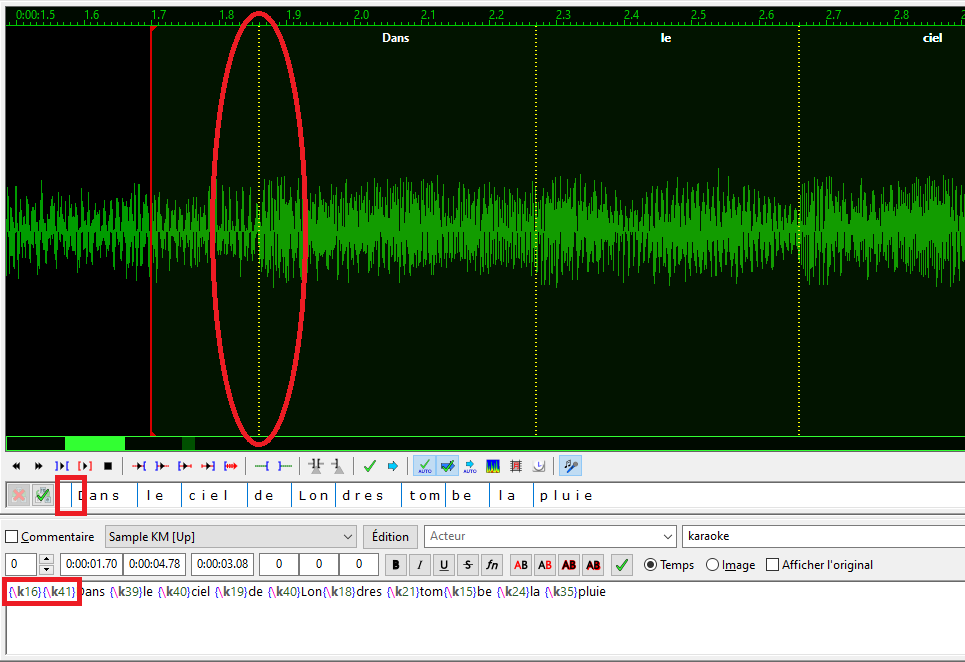
Selecting a syllable in the spectrum
To select a specific syllable, click between the two dashed yellow lines that define it and it will brighten up a little more than all the other syllables.
As the syllables are sometimes a bit short or for other reasons not so easy to hear, you might need several iterations of different bits of the spectrum to get the accuracy you want from your timing.
The white line
A white line is displayed at the current position while the audio is played, but unfortunately it diseappears when paused.
Moving all following syllables forward
You can move all syllables after the current one with it when you press Ctrl while you start dragging. You can even let go of Ctrl as long as you keep holding your left mouse button if you need to drag the whole batch a longer distance.
Lines with only one syllable
If a line contains only one syllable like “Ah”, you can time this by clicking on the green check mark (mouse hover: Commit splits) on the left to the lyrics below the spectrum. A \k tag which is as long as the whole line is then assigned.
Cutting at the very beginning of a line is highly discouraged – we do not want to see this bad habit from you!
If you do so, your line will appear and have an empty time slot right before the first syllable is sung.
If you notice that your line timing is not good enough – meaning it does not start with the first syllable –, you can disable the karaoke timing mode again by clicking this button
and adjust your line timing.
To get this correctly for all syllables in your song, this step can be long and tiresome and you might not be in rhythm on your first attemps but do not give up: speed and precision comes with training. It will be a lot easier with your first 5 to 10 karaoke subs under your belt. ;)
Synchronization in theory and in practise
During synchronization, you can try to have each syllable start the moment when the first vowel is sung (instead of the first letter). It is a lot easier and natural for singers to see a syllable filling at the moment of the vowel as most languages stress the syllable there.
-
For example, if at some time the lyrics are My dear mother and the “M” of “mother” is streched very long, it is not uncommon to make the “mo” syllable (from mother) start at the very moment the “o” is sung (and not the “m”).
-
Usually you will want to include voiced consonants in the syllable and exclude voiceless consonants.
If you want to read more about this, please refer to Advanced aspects of karaoke timing.
Progressive filling
If the instant fill (by \k tag) does not fit the song or a single syllable, “progressive” filling can be used. Here, the first color is successively exchanged with the second one like a wave moving at a speed determined by the syllable duration. The get progressive filling, use the {\kf} tag.
If you want the whole karaoke subtitle to be in progressive filling, you can achieve this with Ctrl+H (Edit > Find and Replace…) by replacing \k for \kf.
If you only want single syllables to get the progressive filling, you have to edit it manually. Usually \kf will look good for syllables longer than 100cs. If the syllable is even longer than 120cs, it is very highly recommened to use \kf.
Mind the gap
If you use progressive filling, you have to includine pauses into your timing to make it look correct all the time. Pauses are time durations where the singer does not sing – also breathing sounds.
If you do not include these pauses in your timing and use \kf anyway, your filling will still go on even if there is no singing to hear, which generally looks ugly.
Please refer to Advanced aspects of karaoke timing for more details on pauses.
\kf vs \K
Aegisub also understands \K as progressive filling tag. Under certain conditions, it will be automaticially converted to \kf in the script. The effect is identical with either tag (\kf or \K) though, so use whichever you like.
Style change depending on the karaoke type (optional)
As you might have noticed, the sample file has a few styles :
- Sample KM [Up]
- Sample KM [Down]
- Sample KM Duo [Voice 1]
- Sample KM Duo [Voice 2]
- Sample KM Duo [Voice 1&2]
- Sample KM [Choir]
Up is the usual line style that you will use mainly.
If you make a karaoke subtitle that can be sung as duet, use the Duo styles. You can find more details on styling for multiple singers here.
If your karaoke has background vocals, you can use the Choir style, it appears between the middle and the top of the screen. Alternatively, use the Down style at the bottom of the screen. Please note here that lines displayed at the bottom of the screen might be invisible for people standing in a crowd.
You can also change the style of multiple lines by simply selecting them and changing the style with the usual drop down menu.
If you want to adapt a certain style (e. g. its colors), do so via the styles manager which we cover in Advanced Aegisub.
Applying the script
A fundamental need for karaoke is that subtitles must be readable. So all lines of text should appear about one second before they have to be sung (lead-in time).
After synchronizing your lyrics and if needed changing it from \k to \kf, you can achieve this approx. 1s lead-in by applying the script already in the template. This script also adds a fade effect at the end of a line.
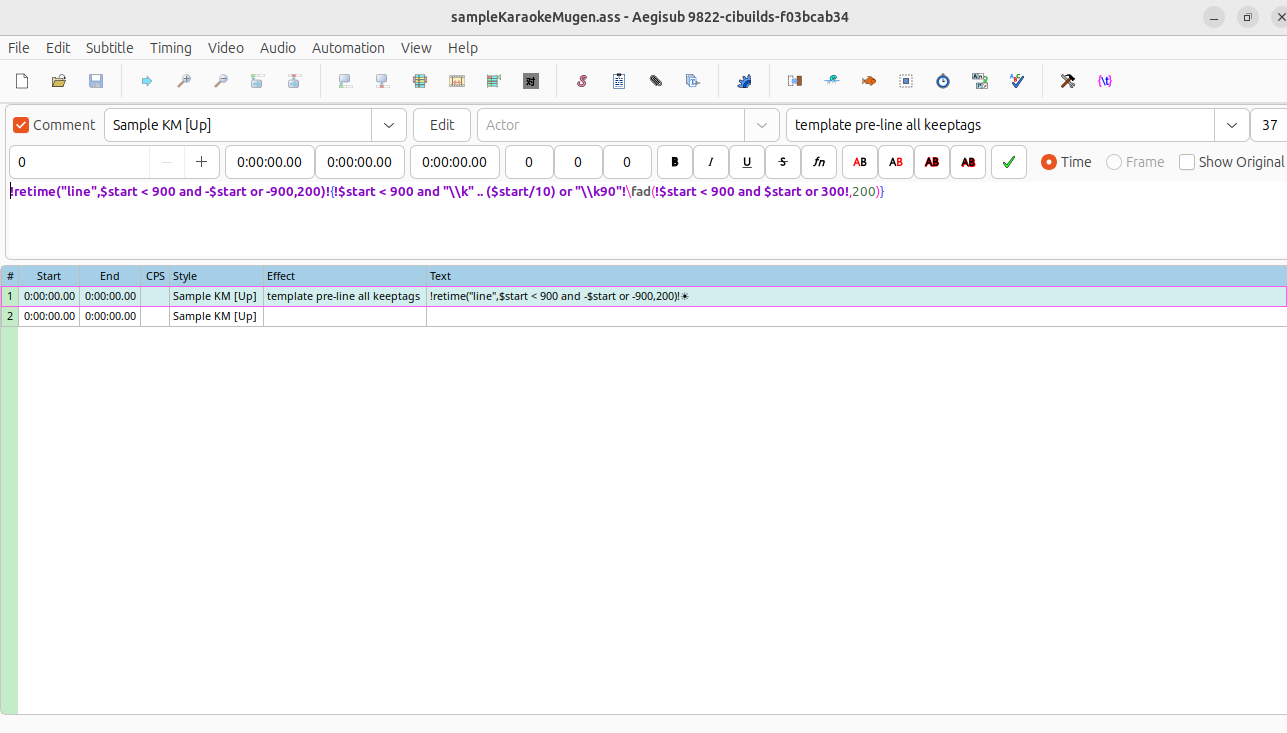
The script is the first line that you see on top. To apply it, go to Automation > Apply karaoke template.
Reduce display delay
If you want the lead-in to be shorter than 0.9 seconds, you can replace all the 900 in the line with the desired value in miliseconds (like 500 for half a second) and the \k90 by the same value divided by ten (like \k50 if you replaced 900 by 500).
Apply the fade-in effect without delay
If for one reason or another, you have to work on a song that doesn’t have the fading effect but has lead-in already, you can apply this script :
!retime("line",$start < 0 and -$start or -0,200)!{!$start < 0 and "\\k" .. ($start/10) or "\\k0"!\fad(!$start < 0 and $start or 300!,200)}This script will add a fade effect to all your lines, and only a fade, no lead-in.
Conclusion
Once you are done, you get something like this:
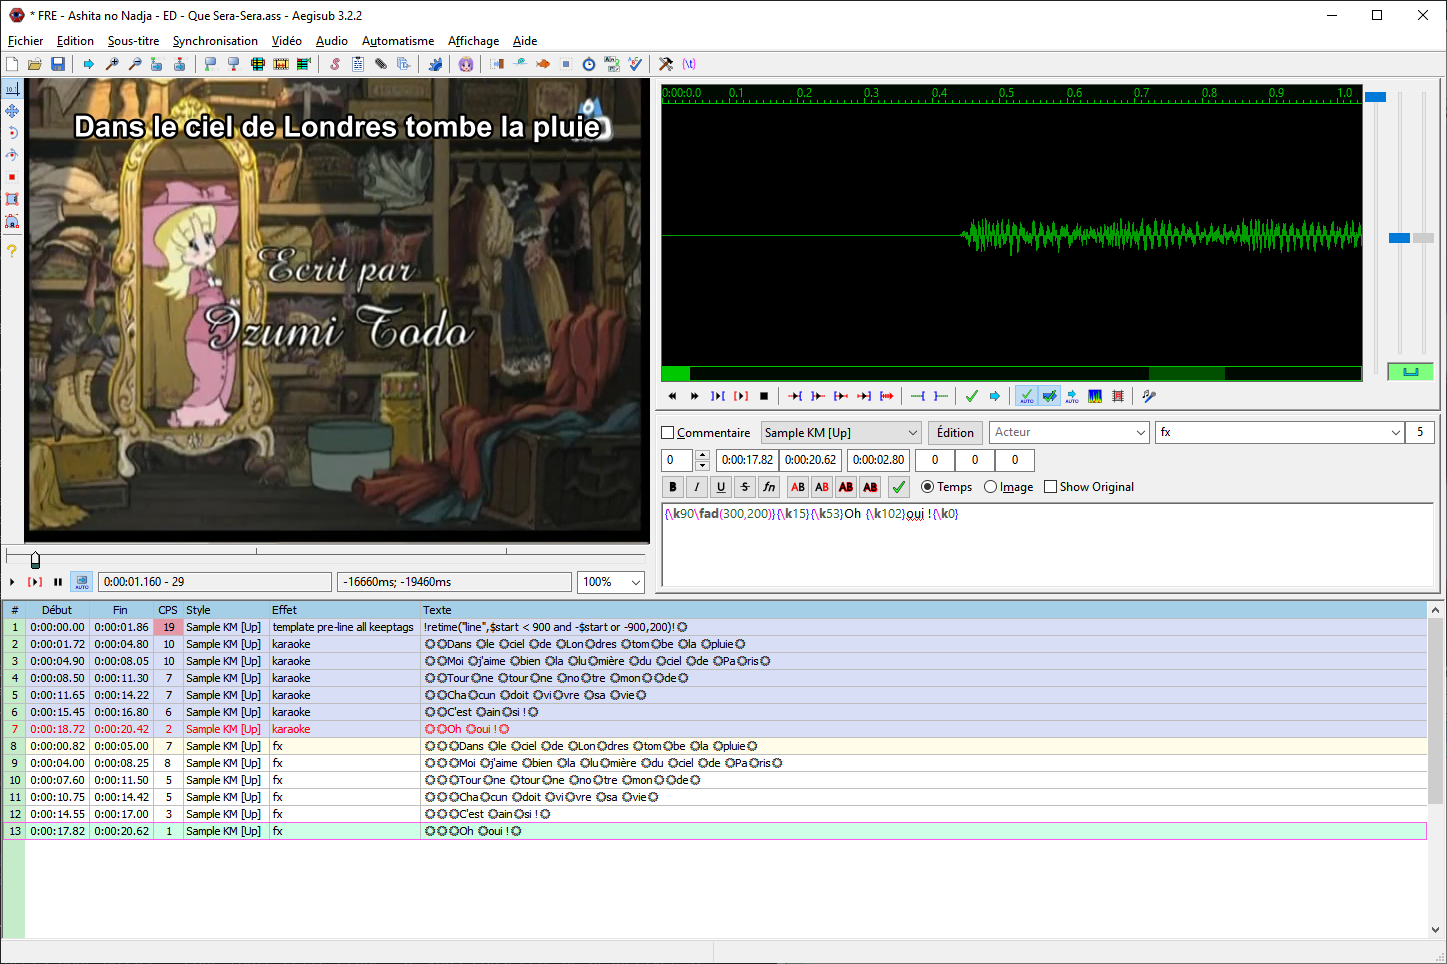
The blue lines marked with karaoke in the effect field are your raw timing. The white fx lines have been added by the script and have the fade and delay applied.
You have completed your first karaoke synchronization! Congratulations! You can now test it and share it with the world!